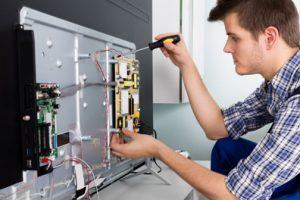
Dryers are essential appliances in our homes, making laundry tasks more manageable and efficient. However, like any other machine, dryers can encounter problems over time. One common issue is a faulty thermostat, which can cause the dryer to overheat or not heat at all. In this blog post, we’ll guide you through the steps to replace a faulty dryer thermostat, ensuring your dryer runs smoothly again.
Understanding the Role of a Dryer Thermostat
Before diving into the replacement process, it’s essential to understand the role of a dryer thermostat. The thermostat regulates the temperature inside the dryer drum. It ensures that the dryer doesn’t overheat, which can cause damage to your clothes and even pose a fire hazard. When the thermostat is faulty, it can lead to various issues, including:
- The dryer not heating up at all.
- The dryer overheating and shutting off.
- Inconsistent drying times.
If you notice any of these symptoms, it’s likely time to replace your dryer thermostat.
Tools and Materials Needed for Replacing a Dryer Thermostat
To replace a faulty dryer thermostat, you’ll need the following tools and materials:
- A new dryer thermostat compatible with your dryer model.
- Screwdrivers (both flathead and Phillips).
- Needle-nose pliers.
- Multimeter (to test the thermostat).
- Safety gloves.
- User manual of your dryer (for reference).
Having these tools ready will make the replacement process smoother and more efficient.
Safety Precautions Before Replacing the Dryer Thermostat
Safety should always be your top priority when working with electrical appliances. Before you start replacing the dryer thermostat, follow these safety precautions:
- Unplug the Dryer: Ensure the dryer is disconnected from the power source to prevent any electrical shocks.
- Wear Safety Gloves: Protect your hands from sharp edges and electrical components by wearing safety gloves.
- Refer to the User Manual: Familiarize yourself with the specific parts and layout of your dryer by consulting the user manual.
Taking these precautions will help you avoid accidents and ensure a safe working environment.
Step-by-Step Guide to Replacing the Dryer Thermostat

Now that you understand the importance of a dryer thermostat and have gathered the necessary tools and safety precautions, let’s move on to the actual replacement process.
Step 1: Locate the Thermostat
The thermostat is typically located near the heating element or blower housing. Depending on your dryer model, you may need to remove the back panel or the top panel to access it. Refer to your user manual for the exact location.
Step 2: Remove the Old Thermostat
Once you’ve located the thermostat, follow these steps to remove it:
- Disconnect the Wires: Use needle-nose pliers to carefully disconnect the wires attached to the thermostat. Take note of their positions for easy reattachment later.
- Unscrew the Thermostat: Use the appropriate screwdriver to remove the screws holding the thermostat in place.
- Remove the Thermostat: Gently pull out the old thermostat from its position.
Step 3: Install the New Thermostat
With the old thermostat removed, it’s time to install the new one:
- Position the New Thermostat: Place the new thermostat in the same position as the old one.
- Secure with Screws: Use the screws to secure the new thermostat in place.
- Reconnect the Wires: Attach the wires to the new thermostat, ensuring they are connected to the correct terminals.
Step 4: Test the New Thermostat
Before reassembling the dryer, it’s crucial to test the new thermostat to ensure it’s working correctly:
- Plug in the Dryer: Reconnect the dryer to the power source.
- Turn on the Dryer: Run the dryer on a normal cycle and monitor the temperature.
- Check for Proper Heating: Ensure the dryer is heating correctly and not overheating.
If the dryer heats up properly and maintains a consistent temperature, the new thermostat is working correctly.
Common Mistakes to Avoid When Replacing a Dryer Thermostat
Replacing a dryer thermostat is a straightforward process, but it’s essential to avoid common mistakes that could lead to further issues. Here are some mistakes to watch out for:
- Not Disconnecting the Power: Always unplug the dryer before starting any repairs to avoid electrical shocks.
- Using the Wrong Tools: Ensure you have the correct tools for the job to avoid damaging the dryer components.
- Incorrect Wire Connections: Take note of the wire positions before disconnecting them and ensure they are reconnected correctly.
Avoiding these mistakes will help you replace the thermostat successfully without causing additional problems.
When to Call a Professional for Help

While replacing a dryer thermostat is a manageable DIY task, there are times when it’s best to call a professional. Consider seeking professional help if:
- You’re unsure about any step of the process.
- The dryer has multiple issues that need addressing.
- You don’t have the necessary tools or safety equipment.
A professional technician can ensure the repair is done correctly and safely, giving you peace of mind.
Keeping Your Dryer Running Smoothly
Replacing a faulty dryer thermostat is a practical solution to ensure your dryer operates efficiently and safely. By following this step-by-step guide, you can handle the replacement process with confidence. Remember to prioritize safety, use the correct tools, and avoid common mistakes. If you encounter any difficulties, don’t hesitate to call a professional for assistance.
For further help or professional repair services, contact us at 0567750003. Keep your dryer running smoothly and efficiently with proper maintenance and timely repairs.


