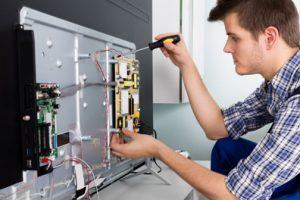
Is your dryer not heating up properly? It might be time to replace the dryer heating element. A malfunctioning heating element can be a common issue, but with the right guidance, you can fix it yourself. In this comprehensive guide, we’ll walk you through the steps to replace a dryer heating element, ensuring your dryer runs efficiently again.
Understanding the Dryer Heating Element
The dryer heating element is a crucial component of your dryer. It generates the heat necessary to dry your clothes. When it fails, your dryer will run, but your clothes will remain damp. Identifying a faulty heating element early can save you time and prevent further damage to your appliance.
Signs of a Faulty Dryer Heating Element
- Clothes Take Longer to Dry: If your clothes are taking longer than usual to dry, it might be due to a weak heating element.
- No Heat: The most obvious sign is the absence of heat. If your dryer runs but doesn’t heat up, the heating element could be the culprit.
- Burning Smell: A burning smell could indicate that the heating element is overheating or malfunctioning.
- Dryer Shuts Off Early: If your dryer stops before the cycle completes, it might be due to overheating from a faulty heating element.
Identifying these signs early on can help you take action before the problem escalates. If you notice any of these symptoms, it’s time to check the dryer heating element.
Tools and Materials Needed
Before you begin, gather the necessary tools and materials to replace the dryer heating element. Having everything on hand will make the process smoother.
- Replacement Heating Element: Ensure you purchase the correct heating element for your dryer model.
- Screwdrivers: Both Phillips and flat-head screwdrivers will be needed.
- Multimeter: To test the continuity of the heating element.
- Pliers: Useful for gripping and pulling wires.
- Safety Gear: Wear gloves and safety goggles to protect yourself.
Having these tools ready will streamline the process and ensure you don’t have to stop midway to find something you need.
Safety Precautions
Safety should always be your priority when working with electrical appliances. Here are some important safety precautions to follow:
- Unplug the Dryer: Always disconnect the dryer from the power source before beginning any repairs to avoid electric shock.
- Wear Safety Gear: Use gloves and safety goggles to protect your hands and eyes.
- Work in a Well-Lit Area: Ensure you have good lighting to see what you’re doing.
- Follow Manufacturer’s Instructions: Refer to your dryer’s manual for specific instructions related to your model.
By following these safety tips, you can prevent accidents and ensure a smooth repair process.
Step-by-Step Guide to Replacing the Dryer Heating Element

Now that you’re prepared, let’s get started with the step-by-step process to replace the dryer heating element.
Step 1: Unplug and Disassemble the Dryer
First, unplug the dryer from the power outlet. Safety is paramount, so ensure there is no electrical connection. Next, remove the back panel of the dryer. This is typically secured with screws, so use your screwdriver to remove them and set them aside.
Step 2: Locate the Heating Element
Once the back panel is removed, locate the dryer heating element. It is usually found at the bottom of the dryer. You may need to remove other components, such as the lint filter or the dryer drum, to access the heating element.
Step 3: Test the Heating Element
Before removing the heating element, use a multimeter to test it. Set your multimeter to the ohms setting and touch the probes to the terminals of the heating element. If the multimeter shows no continuity, it means the heating element is faulty and needs replacement.
Step 4: Remove the Faulty Heating Element
Once you’ve confirmed the heating element is faulty, disconnect the wires attached to it. Take note of their positions for reassembly. Unscrew the heating element from its mounting bracket and carefully remove it from the dryer.
Step 5: Install the New Heating Element
Take your new dryer heating element and secure it to the mounting bracket. Reattach the wires to the appropriate terminals, ensuring they are firmly connected. Double-check that all connections are secure before proceeding.
Step 6: Reassemble the Dryer
With the new heating element in place, reassemble the dryer. Replace any components you removed earlier, such as the lint filter or dryer drum. Secure the back panel with the screws you set aside.
Step 7: Test the Dryer
Plug the dryer back into the power outlet and run a test cycle. Check if the dryer is heating up properly. If it is, you’ve successfully replaced the dryer heating element!
Troubleshooting Common Issues

Sometimes, even after replacing the heating element, you might encounter issues. Here are some common problems and their solutions:
Dryer Still Not Heating
If your dryer still isn’t heating after replacing the element, check the following:
- Thermal Fuse: A blown thermal fuse can prevent the dryer from heating. Test and replace if necessary.
- Thermostat: The thermostat controls the temperature. Test it with a multimeter and replace if faulty.
- Wiring Issues: Ensure all wires are properly connected and there are no loose connections.
Dryer Overheating
If your dryer is overheating, it could be due to:
- Blocked Vent: Ensure the dryer vent is clear and free of obstructions.
- Faulty Thermostat: A malfunctioning thermostat can cause overheating. Test and replace if necessary.
- Heating Element: Ensure the new heating element is properly installed and not causing excessive heat.
Preventive Maintenance Tips
Regular maintenance can extend the life of your dryer heating element and prevent future issues. Here are some tips:
- Clean the Lint Filter: Always clean the lint filter after each use to ensure proper airflow.
- Inspect the Vent: Regularly check and clean the dryer vent to prevent blockages.
- Check Wiring: Periodically inspect the wiring for any signs of wear or damage.
Conclusion
Replacing a dryer heating element is a manageable task that can save you money on repairs. By following this guide, you can ensure your dryer runs efficiently and keeps your clothes dry. Remember to prioritize safety, gather the necessary tools, and follow each step carefully.
If you encounter any issues or need professional assistance, don’t hesitate to contact us at 0567750003. Our team of experts is always ready to help you with your appliance repair needs.
For more tips and guides on home appliance maintenance, stay tuned to our blog. We’re here to help you keep your home running smoothly.


