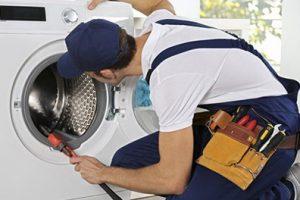
Dryers are essential household appliances, but they can become quite a nuisance when they start making unusual noises. Understanding the common causes of a noisy dryer and knowing how to fix them can save you time, money, and frustration. In this blog post, we’ll explore the typical reasons for a noisy dryer and provide step-by-step solutions to fix them. If you need professional assistance, don’t hesitate to contact us at 0567750003.
1. Loose Drum Belt
One of the most common causes of a noisy dryer is a loose or worn-out drum belt. The drum belt wraps around the drum, motor pulley, and idler pulley, helping to rotate the drum. Over time, the belt can become loose or frayed, leading to thumping or squealing noises.
How to Fix a Loose Drum Belt:
- Unplug the Dryer: Always unplug your dryer before performing any repairs to ensure safety.
- Access the Drum Belt: Remove the top panel of the dryer by unscrewing the screws at the back. Lift the top panel to reveal the drum belt.
- Inspect the Belt: Check the belt for signs of wear or damage. If it’s loose or frayed, it needs to be replaced.
- Replace the Belt: Purchase a replacement belt specific to your dryer model. Follow the manufacturer’s instructions to replace the old belt with the new one.
- Reassemble the Dryer: Once the belt is replaced, reassemble the dryer by securing the top panel back in place.
By following these steps, you can eliminate the noise caused by a loose drum belt and restore your dryer to its smooth, quiet operation.
2. Worn Out Idler Pulley
The idler pulley maintains tension on the drum belt, ensuring it doesn’t slip off. A worn-out idler pulley can cause loud squeaking or squealing noises as it struggles to keep the belt tight.
How to Fix a Worn-Out Idler Pulley:
- Unplug the Dryer: Safety first – always unplug your dryer before starting any repairs.
- Access the Idler Pulley: Remove the front panel of the dryer by unscrewing the screws along the edges. Locate the idler pulley near the motor.
- Inspect the Pulley: Examine the idler pulley for signs of wear, such as cracks or excessive play. If it’s damaged, it needs to be replaced.
- Replace the Pulley: Purchase a replacement idler pulley specific to your dryer model. Follow the manufacturer’s instructions to install the new pulley.
- Reassemble the Dryer: Once the pulley is replaced, reassemble the dryer by securing the front panel back in place.
Replacing a worn-out idler pulley can significantly reduce the noise level of your dryer, making it run more smoothly and quietly.
3. Faulty Drum Rollers

Drum rollers support the drum as it rotates. When these rollers wear out, they can cause a rumbling or thumping noise during operation. This is a common issue in older dryers.
How to Fix Faulty Drum Rollers:
- Unplug the Dryer: Ensure the dryer is unplugged before beginning any repairs.
- Access the Drum Rollers: Remove the front panel and the drum to access the rollers. The drum rollers are typically located at the rear of the dryer.
- Inspect the Rollers: Check the drum rollers for wear and tear. If they are worn out, they need to be replaced.
- Replace the Rollers: Purchase replacement drum rollers specific to your dryer model. Follow the manufacturer’s instructions to install the new rollers.
- Reassemble the Dryer: Once the rollers are replaced, reassemble the dryer by securing the drum and front panel back in place.
Fixing faulty drum rollers can eliminate the rumbling or thumping noise and prolong the life of your dryer.
4. Damaged Blower Wheel
The blower wheel circulates air through the dryer. If it’s damaged or obstructed, it can create a loud rattling or humming noise.
How to Fix a Damaged Blower Wheel:
- Unplug the Dryer: Always ensure the dryer is unplugged before starting any repairs.
- Access the Blower Wheel: Remove the front panel and locate the blower wheel, usually near the motor.
- Inspect the Blower Wheel: Check for any damage or obstructions in the blower wheel. If it’s damaged, it needs to be replaced.
- Replace the Blower Wheel: Purchase a replacement blower wheel specific to your dryer model. Follow the manufacturer’s instructions to install the new wheel.
- Reassemble the Dryer: Once the blower wheel is replaced, reassemble the dryer by securing the front panel back in place.
Replacing a damaged blower wheel can significantly reduce noise and improve the efficiency of your dryer.
5. Loose or Damaged Lint Filter
A loose or damaged lint filter can cause rattling or vibrating noises. Lint filters can become dislodged or damaged over time, leading to noise and decreased dryer performance.
How to Fix a Loose or Damaged Lint Filter:
- Unplug the Dryer: Ensure the dryer is unplugged before beginning any repairs.
- Remove the Lint Filter: Locate the lint filter and remove it from the dryer.
- Inspect the Filter: Check for any signs of damage or wear. If it’s loose or damaged, it needs to be replaced.
- Replace the Filter: Purchase a replacement lint filter specific to your dryer model. Follow the manufacturer’s instructions to install the new filter.
- Reassemble the Dryer: Once the lint filter is replaced, reassemble the dryer.
Fixing a loose or damaged lint filter can eliminate noise and improve the efficiency of your dryer.
6. Worn Drum Glides
Drum glides provide a smooth surface for the drum to rotate. When these glides wear out, they can cause a scraping or grinding noise.
How to Fix Worn Drum Glides:
- Unplug the Dryer: Safety first – always unplug your dryer before starting any repairs.
- Access the Drum Glides: Remove the front panel and the drum to access the drum glides, typically located at the front of the dryer.
- Inspect the Glides: Check the drum glides for wear and tear. If they are worn out, they need to be replaced.
- Replace the Glides: Purchase replacement drum glides specific to your dryer model. Follow the manufacturer’s instructions to install the new glides.
- Reassemble the Dryer: Once the glides are replaced, reassemble the dryer by securing the drum and front panel back in place.
Replacing worn drum glides can eliminate scraping or grinding noises, making your dryer run more smoothly.

7. Loose or Damaged Drum Seals
Drum seals prevent clothes from getting stuck between the drum and the dryer body. If these seals are loose or damaged, they can cause a whistling or scraping noise.
How to Fix Loose or Damaged Drum Seals:
- Unplug the Dryer: Ensure the noisy dryer is unplugged before beginning any repairs.
- Access the Drum Seals: Remove the front panel and the drum to access the drum seals, typically located at the front and rear of the noisy dryer.
- Inspect the Seals: Check the drum seals for signs of wear or damage. If they are loose or damaged, they need to be replaced.
- Replace the Seals: Purchase replacement drum seals specific to your dryer model. Follow the manufacturer’s instructions to install the new seals.
- Reassemble the Dryer: Once the seals are replaced, reassemble the dryer by securing the drum and front panel back in place.
Fixing loose or damaged drum seals can eliminate whistling or scraping noises and improve the efficiency of your dryer.
Conclusion
A noisy dryer can be a significant annoyance, but understanding the common causes and knowing how to fix them can save you from unnecessary stress and expense. Whether it’s a loose drum belt, worn-out idler pulley, faulty drum rollers, damaged blower wheel, loose or damaged lint filter, worn drum glides, or loose drum seals, each issue has a specific solution that you can tackle with confidence.
Remember, if you’re ever in doubt or need professional assistance, don’t hesitate to contact us at 0567750003. We’re here to help you keep your noisy dryer running smoothly and quietly.
By addressing these common issues, you can enjoy a peaceful laundry experience and extend the life of your dryer. Happy drying!


