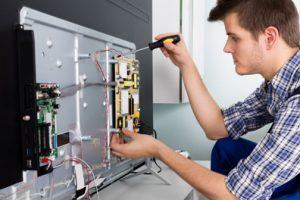
Replacing induction coils might seem daunting, but with the right guidance, it’s a task that even those with minimal technical experience can handle. Whether you’re dealing with an electric stove, an induction heater, or any other device that utilizes induction coils, this step-by-step guide will walk you through the process.
Introduction: Replacing Induction Coils
Induction coils are a critical component in many modern appliances. They are responsible for creating a magnetic field that generates heat, making them essential for the proper functioning of induction cooktops and other devices. Over time, these coils can wear out or become damaged, necessitating a replacement to maintain efficiency and safety.
Tools and Materials Needed

Before you begin the replacement process, gather the necessary tools and materials. Having everything on hand will make the job smoother and more efficient. You will need:
- New induction coil(s)
- Screwdrivers (Phillips and flat-head)
- Multimeter
- Soldering iron and solder
- Wire cutters/strippers
- Insulation tape
- Protective gloves and eyewear
Ensure that your new induction coil is compatible with your specific appliance model. Consult the manufacturer’s guide or contact a professional if you are unsure.
Step 1: Safety First
Safety should always be your top priority when working with electrical components. Follow these essential safety precautions:
- Disconnect Power: Unplug the appliance from the electrical outlet or turn off the circuit breaker that powers the device. Double-check that there is no power running to the appliance before you start working.
- Protect Yourself: Wear protective gloves and eyewear to safeguard against electrical shocks and accidental burns from hot components.
- Clear Workspace: Ensure your workspace is clean, dry, and free from any obstructions. A clutter-free environment reduces the risk of accidents.
Step 2: Accessing the Induction Coil
To replace the induction coil, you need to access it by disassembling the appliance. Follow these general steps, but always refer to your appliance’s specific manual for detailed instructions:
- Remove Exterior Panels: Use a screwdriver to remove any screws securing the exterior panels. Carefully set the screws aside for reassembly later.
- Locate the Induction Coil: Once the panels are removed, locate the induction coil. It is usually positioned under the cooktop surface in stoves or within the main housing of other devices.
- Disconnect Wires: Take note of the wiring configuration before disconnecting any wires connected to the induction coil. You may want to take a photo for reference.
Step 3: Testing the Old Coil
Before replacing the induction coil, it’s wise to test it to confirm it is indeed the faulty component. Use a multimeter to check for continuity:
- Set the Multimeter: Turn your multimeter to the continuity setting.
- Test the Coil: Place the multimeter probes on the coil’s terminals. If the multimeter beeps or shows continuity, the coil is still functional. If there is no continuity, the coil is faulty and needs replacement.
Step 4: Removing the Faulty Coil
With the old coil confirmed as faulty, proceed to remove it:
- Desolder Wires: Use a soldering iron to carefully desolder the wires connected to the induction coil. Be cautious to avoid damaging surrounding components.
- Remove Mounting Screws: Unscrew any mounting screws holding the induction coil in place.
- Lift Out the Coil: Carefully lift the faulty coil out of its housing.
Step 5: Installing the New Coil
Now it’s time to install the new induction coil. Follow these steps:
- Position the New Coil: Place the new induction coil in the same position as the old one. Ensure it fits snugly and aligns with any mounting points.
- Secure with Screws: Use the mounting screws to secure the new coil in place.
- Reconnect Wires: Solder the wires back onto the new induction coil’s terminals, following the same configuration as before.
Step 6: Testing the New Coil
Before reassembling the appliance, it’s crucial to test the new coil to ensure it’s functioning correctly:
- Reconnect Power Temporarily: Carefully reconnect the appliance to power or turn the circuit breaker back on.
- Test the Coil: Use the appliance’s controls to turn on the induction coil. Verify that it heats up correctly and operates without issues.
- Disconnect Power Again: Once testing is complete, disconnect the power once more before proceeding with reassembly.
Step 7: Reassembling the Appliance
With the new coil tested and confirmed to be working, reassemble your appliance:
- Replace Exterior Panels: Reattach the exterior panels, securing them with the screws removed earlier.
- Final Checks: Double-check that all components are securely in place and that there are no loose wires or parts.
- Reconnect Power: Plug the appliance back into the electrical outlet or turn the circuit breaker back on.
Maintenance Tips to Extend Coil Lifespan

To avoid frequent replacements, here are some maintenance tips to extend the lifespan of your induction coils:
- Clean Regularly: Keep the cooktop surface clean to prevent spills from damaging the coils.
- Avoid Overheating: Do not use cookware that is too large for the burner, as it can cause the coil to overheat.
- Check Wiring: Periodically check the wiring connections to ensure they are secure and free from damage.
- Professional Inspections: Consider having a professional inspect your appliance annually to catch potential issues early.
Conclusion
Replacing induction coils can seem challenging, but with this step-by-step guide, you can do it safely and effectively. Remember to prioritize safety, follow the instructions carefully, and consult your appliance’s manual for specific details. If you encounter any difficulties, don’t hesitate to seek professional assistance.
For further assistance or to schedule a professional repair, contact us at 0567750003. We are here to help you keep your appliances running smoothly.
By following this guide, you ensure that your induction appliances remain in optimal working condition, providing you with efficient and reliable performance for years to come.


