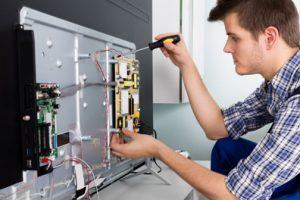
A refrigerator thermostat is crucial for maintaining the right temperature to keep your food fresh. If your fridge isn’t cooling properly, the thermostat might be the culprit. Replacing it is a manageable task that can save you money and extend the life of your appliance. This guide will walk you through the process of replacing a refrigerator thermostat step-by-step.
Understanding the Importance of a Refrigerator Thermostat
Before diving into the replacement process, it’s essential to understand what a refrigerator thermostat does. The thermostat regulates the temperature inside your refrigerator by controlling the compressor and the cooling system. If it fails, your refrigerator may become too warm, leading to spoiled food, or too cold, causing freezing.
Signs of a Faulty Thermostat
Identifying the signs of a faulty thermostat is the first step in determining if you need a replacement. Common signs include:
- Inconsistent Temperature: If your fridge’s temperature fluctuates frequently, it may indicate a thermostat problem.
- No Cooling: A refrigerator that isn’t cooling at all can point to a thermostat failure.
- Over Freezing: If items in your refrigerator are freezing, it might be due to a malfunctioning thermostat.
- Constant Running: A thermostat that doesn’t turn off the compressor can cause the refrigerator to run constantly, increasing energy bills.
Why Replace Instead of Repair?
Replacing a faulty thermostat is often more cost-effective than repairing it. A new thermostat ensures your refrigerator operates efficiently and can help prevent further issues. Plus, it’s a straightforward DIY task that doesn’t require extensive technical knowledge.
Tools and Materials Needed for Replacement

Before starting the replacement process, gather the necessary tools and materials. Having everything ready will make the task smoother and quicker.
Tools Required
- Screwdrivers: Both flathead and Phillips screwdrivers will be necessary to remove panels and screws.
- Needle-Nose Pliers: Useful for handling small parts and wires.
- Multimeter: To check electrical continuity.
- Thermostat Replacement Kit: Ensure you have the correct model for your refrigerator.
Materials Needed
- New Thermostat: Purchase the right thermostat compatible with your refrigerator model.
- Owner’s Manual: Having the refrigerator’s manual can be helpful for specific instructions.
- Safety Gloves: Protect your hands during the process.
- Cleaning Supplies: Clean the area around the thermostat to ensure a smooth installation.
Safety First
Before beginning any repair work, prioritize safety. Unplug the refrigerator from the power source to prevent any electrical accidents. If your fridge is hardwired, turn off the circuit breaker.
Step-by-Step Guide to Replacing the Thermostat
Replacing a refrigerator thermostat involves several steps, each crucial for a successful installation. Follow these instructions carefully.
Step 1: Locate the Thermostat
The first step is to locate the thermostat. In most refrigerators, the thermostat is found in the fresh food section, behind a control panel. Refer to your owner’s manual if you’re unsure where it’s located.
- Remove Shelves and Drawers: Take out any shelves or drawers that obstruct access to the control panel.
- Remove the Control Panel: Use a screwdriver to remove screws holding the control panel. Carefully detach the panel to expose the thermostat.
Step 2: Remove the Faulty Thermostat
With the thermostat in view, you can proceed to remove the faulty unit.
- Disconnect the Wires: Note the wire connections or take a photo for reference. Use needle-nose pliers to gently disconnect the wires from the thermostat.
- Remove the Thermostat: Unscrew any mounting screws and remove the old thermostat from its position.
Step 3: Install the New Thermostat
Installing the new thermostat is a reversal of the removal process. Ensure you handle the new part with care.
- Connect the Wires: Refer to your notes or photo to connect the wires to the new thermostat. Make sure each wire is securely attached.
- Mount the Thermostat: Position the new thermostat where the old one was installed. Secure it with mounting screws.
Step 4: Reassemble and Test
After installing the new thermostat, reassemble the control panel and any removed parts.
- Replace the Control Panel: Screw the control panel back in place, ensuring it’s securely attached.
- Reinsert Shelves and Drawers: Put back any shelves or drawers you removed earlier.
- Plug in the Refrigerator: Restore power to the refrigerator by plugging it in or turning on the circuit breaker.
Step 5: Monitor Performance
Give your refrigerator a few hours to stabilize and monitor its performance. Check the temperature settings and ensure the fridge is cooling properly. If you notice any issues, double-check the installation or consult a professional.
Troubleshooting Common Issues
Even with careful installation, you might encounter some issues. Here are common problems and how to troubleshoot them.
Refrigerator Not Cooling
If your refrigerator isn’t cooling after replacing the thermostat, check the following:
- Correct Wiring: Ensure all wires are connected properly.
- Thermostat Settings: Verify the thermostat is set to the correct temperature.
- Compressor Function: Listen for the compressor running. If it’s silent, there might be another issue.
Over Freezing
If the refrigerator is over-freezing:
- Thermostat Calibration: Adjust the thermostat to a warmer setting.
- Air Flow: Ensure nothing is blocking the vents inside the fridge.
Constant Running
If the fridge runs constantly:
- Temperature Settings: Verify the thermostat settings.
- Door Seals: Check that the door seals are intact and sealing properly.
Maintaining Your Refrigerator Thermostat

Proper maintenance can extend the life of your new thermostat and keep your refrigerator running efficiently.
Regular Cleaning
Dust and debris can affect the thermostat’s performance. Regularly clean the control panel and the area around the thermostat.
Checking Settings
Periodically check the thermostat settings to ensure they haven’t been accidentally changed. Keeping the thermostat at the correct setting helps maintain optimal temperature.
Professional Inspections
Consider annual professional inspections to ensure all refrigerator components, including the thermostat, are in good working order.
Conclusion
Replacing a refrigerator thermostat is a manageable DIY task that can save you money and ensure your appliance operates efficiently. By following this guide, you can confidently replace your refrigerator thermostat and troubleshoot common issues. Remember, if you encounter any problems or need further assistance, don’t hesitate to consult a professional.
For expert advice and professional refrigerator repairs, contact us at 0567750003. We’re here to help you keep your appliances in top condition.


